Emilepatreelblog
Saturday, 30 April 2011
Tables
I have been working on different table designs for a while now and have settled for a square top. The table featured in the top image will be used in my portable room as after making the table in the bottom photo, it turned out too large. I prefere the narrower, taller table as it seems more in proportion. The second table may feature outside for my mini installation. The table has been much harder to construct than I first thought. The cardboard has had to be layered together significantly to produce something which strong enough. When glued together, the table becomes very strong carrying over 20 heavy books as a test! By making the base the way I have it means the table can be slotted together, then a think layer of glue attaches the table top. Although I am trying to stray away from too much glue, in this case it really helped reinforce the card. I still have had the slotting together element in place so haven't relied too heavily on glue. Overall, I am pleased with my finished table.
Wednesday, 27 April 2011
Shelves
Here are my finished shelves which will feature in my portable room. As you can see from the images, the shelves piece together with tabs which then fit into cut out slots. The shelves were quite difficult to make, but referring to my mini model really helped as I could times everything by 6.5 to get the right scale. The shelves require no glue and once all the pieces are perfectly accurate, they slot into each hole quite easily. Overall, I am pleased with how the shelving has turned out as it took so much planning to get right. I have also found some brown tape which helps neaten up all the edges, so I am feel they have a quite professional feel to them.
Monday, 25 April 2011
Cuckcoo Clock
I have been working for two days on my cuckoo clock which will feature in my room on wheels, and it is finally complete! I have made something really decorative and pretty, yet it still holds that conceptual idea of being made from cardboard. I think at a first glance it may not look like a cardboard clock, especially if it were to be painted. My main reasoning for making a clock is that even when made of cardboard the clock still acts as a useable object. This idea remains very important to me. For instance, I could make bookshelves very easily that looked like shelving, yet they need to have the strength and stability to act as shelving and not just look that way. Hopefully, I will be able to achieve this by testing out different ways of reinforcing cardboard.
Friday, 22 April 2011
Cardboard Research 2
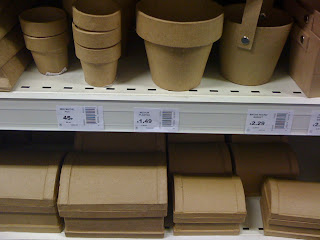
I visited Hobbycraft to see the range of cardboard items they sold. It was a useful trip as the store had a wide range of products which were exclusively cardboard. I was particularly interested in ways I could try to make these objects myself. So far, I have only experimented with larger furniture pieces and haven't thought too much about accessories. For me to make some of these objects might not be possible as I feel I would have to begin adding different materials other than cardboard which is something I don't really want to do. I liked the cardboard book idea, shown above, yet it was actually a box when opened up which I'm not sure I like. I want my objects to function as they are supposed to and not be disguised as another object.
Wednesday, 20 April 2011
Cardboard Research
I have visited Ikea for research into the construction of cardboard. I found it really useful to see a top retail brands way of attaching the card together. I noticed some was stitched, some had slots cut out so it could fit together with no attachments. I also looked at ways of strengthening cardboard and it would seem Ikea often add layers of thick cardboard behind and then have a paper glued on top, this particular box also flat packed which made it ultra portable and mobile. I also liked the box which had draws as I hadn't previously thought about this. It seems like quite an easy thing to make once the shelves are constructed it could slot into place.
Tuesday, 19 April 2011
Degree Show Floor
My degree show floor is almost complete! As you can see from the photos, the base is easy to dissemble and comes to pieces in panels, the framework also unscrews quickly and efficiently meaning the whole piece can be taken apart in under 10 minutes.
The wheels still need to be added for optimum mobility and a handle on the side, making it easy to pull along if you choose. Once back at university, the walls will be built up around it creating my room on wheels.
Tuesday, 12 April 2011
Mini Test Furniture
This scaled down version of a book shelf is only about 15cm tall, yet took HOURS to construct! I had to work out exact measurements for the piece to slot together without using any glue. I want the furniture to as much as possible, be pieced together adding to the flat pack idea. I also believe this way, they object can be take apart without ruining it or having to unscrew everything. Lets hope the real, life size version goes to plan.
Subscribe to:
Comments (Atom)


